WebDAV connections
7.1.0+ This feature is available starting with Xima® Formcycle version 7.1.
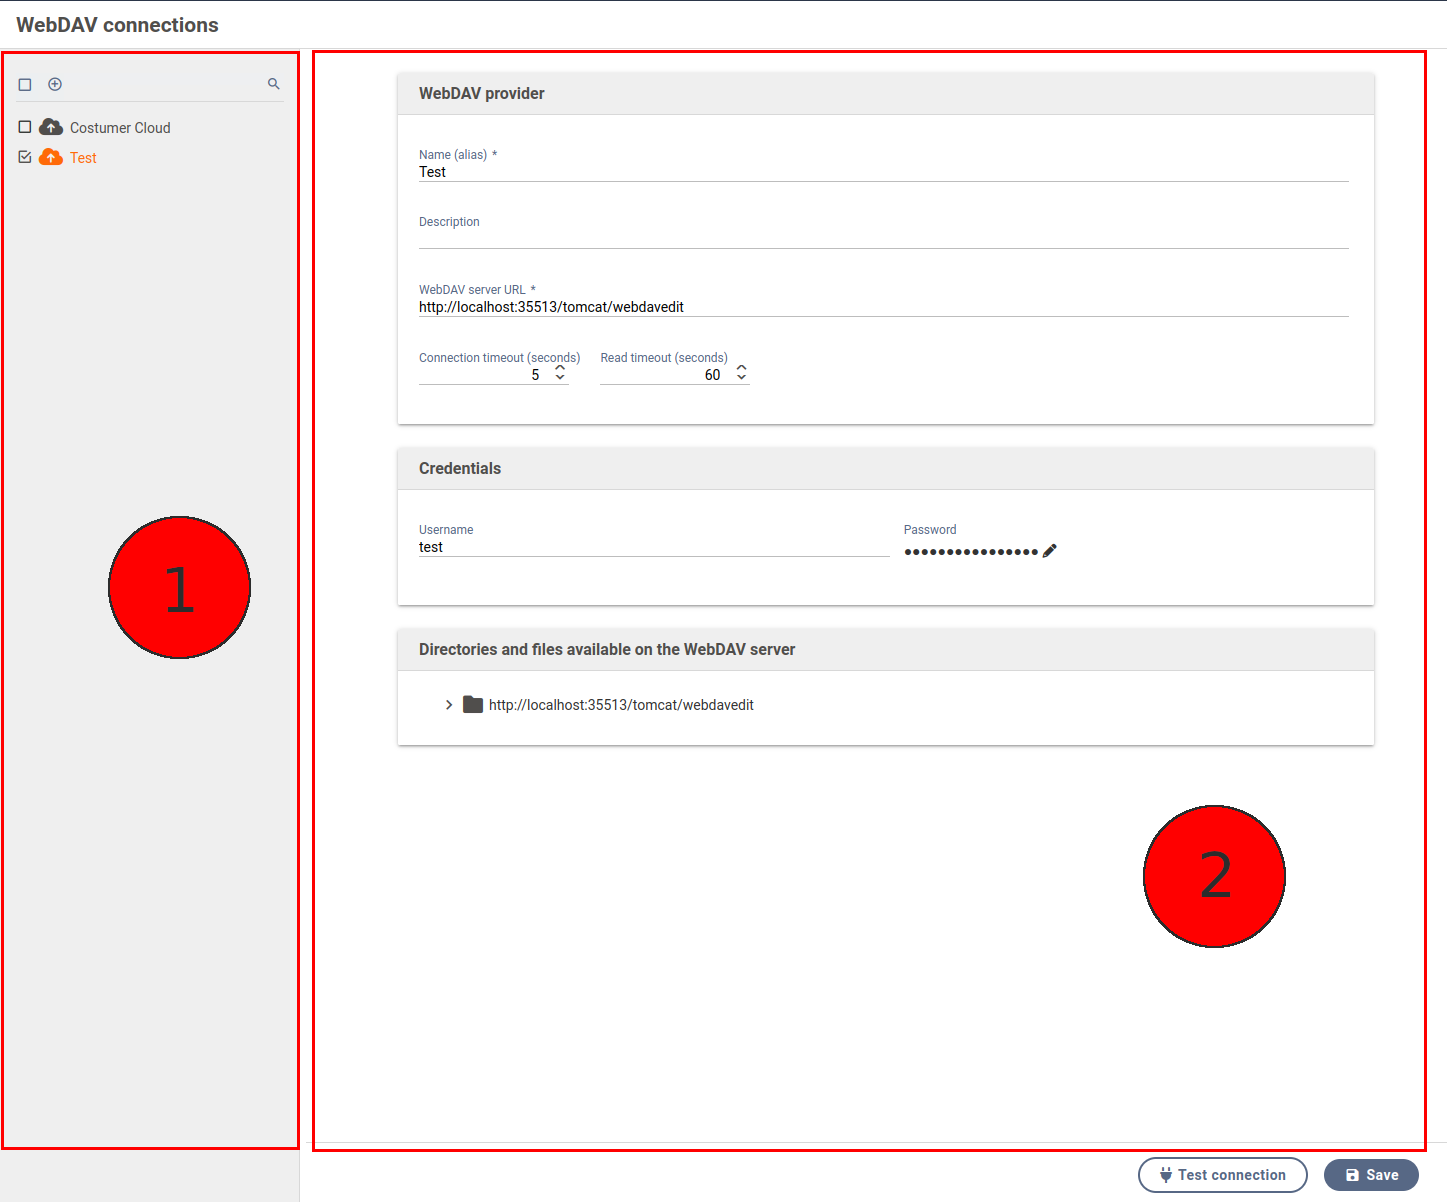
The WebDAV connections menu lets you configure connections globally and reuse them later. For example, users can later select a WebDAV connection in the workflow action Save to WebDAV server without having to be aware of the connection details.
Create WebDAV connection
- Open the "WebDAV connections" module and click on the "new" button in the list header.
- Assign any alias and an optional description.
- The following data is required for the WebDAV connection itself:
- WebDAV Server URL
- This consists of protocol, server, port and path.
- Read timeout
- Timeout in seconds for establishing a connection to the WebDAV server.
- Connection timeout
- Timeout in seconds for reading data from the WebDAV server (maximum time allowed between two data packets).
- User name
- User name for the WebDAV server.
- Password
- Password for the WebDAV server.
WebDAV server URL
- Protocol
- Currently, HTTP (unencrypted) and HTTPS (encrypted) are available. If the WebDAV server supports it, the use of HTTPS is recommended.
- Server
- The address of your WebDAV provider. A path can already be attached here so that later only access to this directory and subdirectories is possible.
- Port
- By default, port 80 is used for HTTP and 443 for HTTPS. If different, this must be specified here.
- Path
- Specify a subfolder to be used here.
After the WebDAV connection has been created, it appears in the left-hand panel (list) of the connections.
Test WebDAV connection
You can aslo check whether the entered connection data is valid. Click on the "Test Connection" button to check whether a connection to the WebDAV server can be established. If successful, all existing folders and files are displayed at the bottom.


